Showing posts with label Blogger. Show all posts

Wednesday, December 16, 2015

How to upload image and get URL

How to upload image and get the URL of image ? Yes! it is realy true and we can host image with supported of free image hosting site as like www.picasa.google.com, photobucket.com. flicker.com. many more hosted site have on internet but now i'm going to talking about and own of google picasa image hosting site.
so please go from below link to to picasa site

Visit picasa website

1. When you visited picasa site then you will see "Upload Photos" so click an that option

2. And Drag photo here choose image from computer and select when you'll selected


3. Now click on image and view ful size and press right click Button on mouse and give "Copy image URL"

Then paste that is URL whatever you want <img src='Your Image URL here'/> Thank you.

Remove Pencli and wrench icon Blogger

Can i remove Pencil and and wrench icon from my blogger site ?
Yes! offcurse you can easy to erase
1. first Go to blogger template and click on "Edit HTML and find inside box Like this ]]></b:skin> and just paste below code after or above ]]></b:skin>
.quickedit{Display:none;} 


For example: see here screenshot how to do......

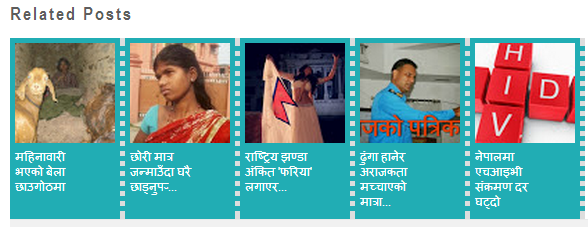
How to Display Related Articles Every Below Posts in Blogger

Sometimes you may want to give some extra stuff to your visitors so that they can engage and spend more time on your website. Engaging readers for a longer period of time is something that is extremely useful for not only growth but increase in the revenue of a website. The more time people spend on your site, the more chance of getting good sales through affiliates, Adsense or etc anyway follow the below instruction how to insert related post inside every blogger post ?


Steps adding the Related Posts Widget to Blogger/Blogspot
1. Go To Blogger Dashboard >> Template >>Edit HTML
2. Click anywhere inside the template's code and press the CTRL + F keys or F3 key
3. Now Search for this piece of code by typing it inside the search box:
                               ]]></b:skin
4 Copy and paste below code just above the ]]></b:skin> tag.
#related-posts {

float:center;

text-transform:none;

height:100%;

min-height:100%;

padding-top:5px;

padding-left:0px;

}

#related-posts h2{

font-size: 18px;

letter-spacing: 2px;

font-weight: bold;

text-transform: none;

color: #5D5D5D;

font-family: Arial Narrow;

margin-bottom: 0.75em;

margin-top: 0em;

padding-top: 0em;

}

#related-posts a{
background:#21adb4;

border-right: 5px dotted #DDDDDD;

color:#ffffff;

}

#related-posts a:hover{

color:black;

background-color:#ffffff;
border: 5px dotted #21adb4;
color:#000000;

}

5. Now copy and paste below code just above the </head> tag.
<b:if cond='data:blog.pageType == &quot;item&quot;'>
<script type='text/javascript'>
var defaultnoimage=&quot; https://blogger.googleusercontent.com/img/b/R29vZ2xl/AVvXsEhYA8xx3SYxJkzgqIyWzC2Q83DrHBByDjpcxOrLzUwqwe3_CD5m-vS5f-yksyZRVgQdXwz9ZJmF-MOxc4wpnwty1OypQcbv0LLw4Umgu_C2lATBFqevsq3xBeLWrn7zXaHhEmwGTRmdeco/s128-no/&quot;;
var maxresults=5;
var splittercolor=&quot;#DDDDDD&quot;;
var relatedpoststitle=&quot;Related Posts&quot;;
</script>
<script src=' https://kedar-adhikari.googlecode.com/svn/aajakopatrika.com.js' type='text/javascript'/>

</b:if>

Please remember: - to change the ammount of related post var maxresults=5;,
6. Now find the following code (you might find it twice, stop at the second one):

<div class='post-footer'>

7. Now finaly copy and paste the below code just above the  <div class='post-footer'> tag.
<div id='related-posts'>

<b:loop values='data:post.labels' var='label'>

<b:if cond='data:label.isLast != &quot;true&quot;'>

</b:if>

<script expr:src='&quot;/feeds/posts/default/-/&quot; + data:label.name + &quot;?alt=json-in-script&amp;callback=related_results_labels_thumbs&amp;max-results=6&quot;' type='text/javascript'/></b:loop>

<script type='text/javascript'>

removeRelatedDuplicates_thumbs();

printRelatedLabels_thumbs(&quot;<data:post.url/>&quot;);

</script>

</div><div style='clear:both'/>


<!-- remove --></b:if>

9. Now last step save the templates the related post is successfully has been done!

Tuesday, December 15, 2015

How To Add Flying Twitter Bird Widget To Blogger

You Might have seen animated flying Twitter bird on many Blogs and Page. Well this is a Popular Widget.and Also it is Very easy to install.Wherever You Scroll on the Page the Twitter Bird Follows you on the Page.So Add this Simple Widget and Add Some Uniqueness to your Blog.
1. First Go on Blogger Dashboard "Templates > Edit HTML
2. Now search for the </body> tag and paste the below code just above it.

<!-- Twitter Bird Widget for Blogger by Online Guru -->
<script type="text/javascript" src="https://kedar-adhikari.googlecode.com/svn/tuwtwitterbird.js">
</script>
<script type="text/javascript">
var twitterAccount = "kedargk6";
var tweetThisText = " <data:blog.pageTitle/> : <data:blog.url/> ";
tripleflapInit();
</script>
<span style="font-size:11px;position:absolute;"><a title='Online Guru' href="http://adhikarikedar.blogspot.com" target='_blank'>Online Guru</a></span>
<!-- Twitter Bird Widget for Blogger by Online Guru -->


3. Now change the Twitter user name "Kedargk6" with your own and finally save the templates.

Sunday, December 13, 2015

How to add auto read more with thumbnails Blogger

This Automatic Read More script will summarize content and a post summary will be shown only on the main blog page (Homepage) category pages, and archive pages.


  Using the Automatic Read More feature in Blogger Posts
1. First go to your blogger and log in with your user name and password
2. Now locate this options "Dashboard > Template > Edit HTML" then click on Format Template
3.  Press "CTRL+F" from keyboard layout and type this code  <data:post.body/> and find it there in             HTML box
4. Now replace the above code with below code
<b:if cond='data:blog.pageType != &quot;item&quot;'>
<b:if cond='data:blog.pageType != &quot;static_page&quot;'>
<div expr:id='&quot;summary&quot; + data:post.id'><data:post.body/></div>
  <script type='text/javascript'>createSummaryAndThumb(&quot;summary<data:post.id/>&quot;);</script>
<span class='readmore' style='float:right'><a expr:href='data:post.url'>Read More &#187;</a></span></b:if></b:if>
<b:if cond='data:blog.pageType == &quot;item&quot;'><data:post.body/></b:if>
<b:if cond='data:blog.pageType == &quot;static_page&quot;'><data:post.body/></b:if>

5. Now search for the following tag
    </head>
6. Just above the </head> tag add the following code
<script type='text/javascript'>
posts_no_thumb_sum = 490;
posts_thumb_sum = 400;
img_thumb_height = 120;
img_thumb_width = 120;
</script>
<script type='text/javascript'>
//<![CDATA[
function removeHtmlTag(strx,chop){
if(strx.indexOf("<")!=-1)
{
var s = strx.split("<");
for(var i=0;i<s.length;i++){
if(s[i].indexOf(">")!=-1){
s[i] = s[i].substring(s[i].indexOf(">")+1,s[i].length);
}
}
strx = s.join("");
}
chop = (chop < strx.length-1) ? chop : strx.length-2;
while(strx.charAt(chop-1)!=' ' && strx.indexOf(' ',chop)!=-1) chop++;
strx = strx.substring(0,chop-1);
return strx+'...';
}
function createSummaryAndThumb(pID){
var div = document.getElementById(pID);
var imgtag = "";
var img = div.getElementsByTagName("img");
var summ = posts_no_thumb_sum;
if(img.length>=1) {
imgtag = '<span class="posts-thumb" style="float:left; margin-right: 5px;"><img src="'+img[0].src+'" width="'+img_thumb_width+'px" height="'+img_thumb_height+'px"/></span>';
summ = posts_thumb_sum;
}
var summary = imgtag + '<div>' + removeHtmlTag(div.innerHTML,summ) + '</div>';
div.innerHTML = summary;
}
//]]>
</script>

Note: you can modify above the blue code number 490, 400, 120 or 120 whatever you have choosed.

Saturday, December 12, 2015

How to Add make stylish custom labels cloud widget ?

On this post I 'm going to share a so nice CSS labels style for your blogger. This tricks you can easily apply for your blogger blog labels widget by just adding some simple CSS codes into your blog. Blogger Tag Clouds are used to show all the categories or labels present in a blog. By default blogger comes with simple design they do not look beautiful. But we designed our labels widget like CSS buttons, which will be looking attractive more than the default blogger labels cloud widget style.


1. Sign in to your blogger and locate this options "Dashboard > Templates > Edit HTML"
2. Search for below tag in your blogger template ]]><b:sklin> 
3. Then copy and paste below  CSS codes above ]]><b:skin> tag

/*----- Custom Labels Cloud by online guru-----*/ 
.label-size 

position:relative; 
margin:0; 
padding:0; 

.label-size a 

float:left; 
height:24px; 
line-height:24px; 
position:relative; 
font-size:12px; 
margin-bottom:9px; 
margin-left:20px; 
background:#2aa4cf; 
color:#fff; 
text-decoration:none; 
-moz-border-radius-bottomright:4px; 
-webkit-border-bottom-right-radius:4px; 
border-bottom-right-radius:4px; 
-moz-border-radius-topright:4px; 
-webkit-border-top-right-radius:4px; 
border-top-right-radius:4px; 
padding:0 10px 0 12px; 

.label-size a:before 

content:""; 
float:left; 
position:absolute; 
top:0; 
left:-12px; 
width:0; 
height:0; 
border-color:transparent #0089e0 transparent transparent; 
border-style:solid; 
border-width:12px 12px 12px 0; 

.label-size a:after 

content:""; 
position:absolute; 
top:10px; 
left:0; 
float:left; 
width:4px; 
height:4px; 
-moz-border-radius:2px; 
-webkit-border-radius:2px; 
border-radius:2px; 
background:#fff; 
-moz-box-shadow:-1px -1px 2px #004977; 
-webkit-box-shadow:-1px -1px 2px #004977; 
box-shadow:-1px -1px 2px #004977; 

.label-size a:hover 

background:#555; 

.label-size a:hover:before 

border-color:transparent #555 transparent transparent; 

4. Now save your template
5. Making for custom label cloud widget to do this...
You have to go to Dashboard > Layout > Edit the "Labels" widget option and set "cloud" mode. for example see below screenshot


Now save your template and your are done ! go to your blog site and refresh one more and view your cloud label.

How To Add Rotating Effect Image To Your Blog

Adding different effect to your blog images is another great way of engaging your readers, probably they will stay longer on your blog if they found out that your blog images are having different effect and they might want to check more of your blog images to see the awesome effect.
Look at below demo image


So how to insert this method on your blog please see at below my instruction
1. Go to your blog and log in with your email and password
2. Now Go to your blog dashboard "Template > Edit HTML > Procced"
3. Press "CTRL+F" to find the text ]]></b:skin> and paste the following code just above it


.spinningeffect img {
 /* Spinning Social Icons Widget By www.realcombiz.com */

    -moz-transition: all 
0.8s ease-in-out;
    -webkit-transition: all 
0.8s ease-in-out;
    -o-transition: all 
0.8s ease-in-out;
    -ms-transition: all 
0.8s ease-in-out;
    transition: all 
0.8s ease-in-out;
}

.spinningeffect img:hover {

    -moz-transform: rotate(
360deg);
    -webkit-transform: rotate(
360deg);
    -o-transform: rotate(
360deg);
    -ms-transform: rotate(
360deg);
    transform: rotate(
360deg);
}


4. You can customize the spinning effect to your own satisfaction by editing the code below.
To change the rate (time taken) at which the image rotate, simple edit 0.8s
You can also change the degree at which the image rotate by editing 360deg

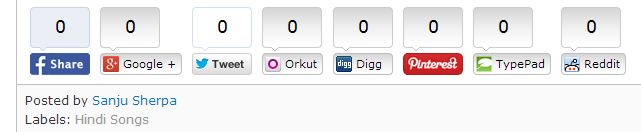
How To Add Social media Sharing Button Below Blogger Post ?

We will add Social Media Sharing Button with every below Post Title in Blogger. We have mentioned some steps below follow them exactly.


1.  Backup your template:
2. Go to Blogger > Edit HTML:  ( For new infrastructure of blogger click on "Template > Edit HTML" button from dropdown manu of blogger dashboard.)
3. Click on Expand Widget Template.
4. find following code by pressing (Ctrl + f )


         </head>

Step 5. Copy and past following code Above </head> tag.
<script type='text/javascript'>var switchTo5x=true;</script> <script src='http://w.sharethis.com/button/buttons.js' type='text/javascript'/> <script type='text/javascript'>stLight.options({publisher: &quot;ur-404af1e-8466-e495-f39d-559b597b9b17&quot;}); </script>

Step 6. Now Search For <data:post.body/> and Past following code below it.

<b:if cond='data:blog.pageType == &quot;item&quot;'> <center><span style='color: #009900; font-size: 12px; font-family: Verdana;'>If You Enjoyed This Post Please Take 5 Seconds To Share It.</span></center><br/> <span class='st_facebook_vcount' displayText='Facebook'/> <span class='st_googleplus_vcount' displayText='Google +'/> <span class='st_twitter_vcount' displayText='Tweet'/> <span class='st_orkut_vcount' displayText='Orkut'/> <span class='st_digg_vcount' displayText='Digg'/> <span class='st_pinterest_vcount' displayText='Pinterest'/> <span class='st_typepad_vcount' displayText='TypePad'/> <span class='st_reddit_vcount' displayText='Reddit'/> </b:if>
Step 7. Now finally Hit Save/Publish Button, and see your blog.

How to remove Blogger image Shadow and Border

If you want to remove of those annoying shadows and borders around blogger post images, then follow the instruction

For using the old blogger interface.
1. First go to Dashboard >Template > Customize > Advanced > Add CSS - paste the following code Press enter after the last character of the last line } - Apply to Blog.


border: 1px solid $(image.border.color);

  -moz-box-shadow: 1px 1px 5px rgba(0, 0, 0, .1);
  -webkit-box-shadow: 1px 1px 5px rgba(0, 0, 0, .1);
  box-shadow: 1px 1px 5px rgba(0, 0, 0, .1);

For using the new blogger interface
2. Go to Blogger Dashboard > Template > Edit HTML

Click on "Format Template" and search by pressing the CTRL + F keys for the following code

border: 1px solid $(image.border.color);
  -moz-box-shadow: 1px 1px 5px rgba(0, 0, 0, .1);
  -webkit-box-shadow: 1px 1px 5px rgba(0, 0, 0, .1);
  box-shadow: 1px 1px 5px rgba(0, 0, 0, .1);

3. After found above the code and remove all blue color line of the code then finally save your Template and has been Done!