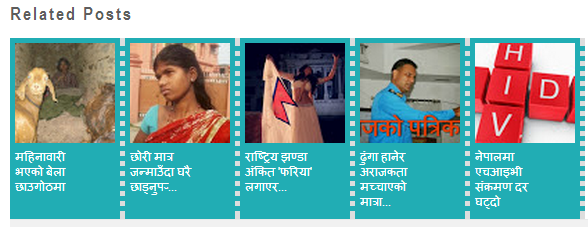
Sometimes you may want to give some extra stuff to your visitors so that they can engage and spend more time on your website. Engaging readers for a longer period of time is something that is extremely useful for not only growth but increase in the revenue of a website. The more time people spend on your site, the more chance of getting good sales through affiliates, Adsense or etc anyway follow the below instruction how to insert related post inside every blogger post ?

Steps adding the Related Posts Widget to Blogger/Blogspot
1. Go To Blogger Dashboard >> Template >>Edit HTML
2. Click anywhere inside the template's code and press the CTRL + F keys or F3 key
3. Now Search for this piece of code by typing it inside the search box:
Please remember: - to change the ammount of related post var maxresults=5;,
6. Now find the following code (you might find it twice, stop at the second one):
<div class='post-footer'>
7. Now finaly copy and paste the below code just above the <div class='post-footer'> tag.
9. Now last step save the templates the related post is successfully has been done!

Steps adding the Related Posts Widget to Blogger/Blogspot
1. Go To Blogger Dashboard >> Template >>Edit HTML
2. Click anywhere inside the template's code and press the CTRL + F keys or F3 key
3. Now Search for this piece of code by typing it inside the search box:
]]></b:skin
4 Copy and paste below code just above the ]]></b:skin> tag.
#related-posts {
float:center;
text-transform:none;
height:100%;
min-height:100%;
padding-top:5px;
padding-left:0px;
}
#related-posts h2{
font-size: 18px;
letter-spacing: 2px;
font-weight: bold;
text-transform: none;
color: #5D5D5D;
font-family: Arial Narrow;
margin-bottom: 0.75em;
margin-top: 0em;
padding-top: 0em;
}
#related-posts a{
background:#21adb4;
border-right: 5px dotted #DDDDDD;
color:#ffffff;
}
#related-posts a:hover{
color:black;
background-color:#ffffff;
border: 5px dotted #21adb4;
color:#000000;
}
5. Now copy and paste below code just above the </head> tag.float:center;
text-transform:none;
height:100%;
min-height:100%;
padding-top:5px;
padding-left:0px;
}
#related-posts h2{
font-size: 18px;
letter-spacing: 2px;
font-weight: bold;
text-transform: none;
color: #5D5D5D;
font-family: Arial Narrow;
margin-bottom: 0.75em;
margin-top: 0em;
padding-top: 0em;
}
#related-posts a{
background:#21adb4;
border-right: 5px dotted #DDDDDD;
color:#ffffff;
}
#related-posts a:hover{
color:black;
background-color:#ffffff;
border: 5px dotted #21adb4;
color:#000000;
}
<b:if cond='data:blog.pageType == "item"'>
<script type='text/javascript'>
var defaultnoimage=" https://blogger.googleusercontent.com/img/b/R29vZ2xl/AVvXsEhYA8xx3SYxJkzgqIyWzC2Q83DrHBByDjpcxOrLzUwqwe3_CD5m-vS5f-yksyZRVgQdXwz9ZJmF-MOxc4wpnwty1OypQcbv0LLw4Umgu_C2lATBFqevsq3xBeLWrn7zXaHhEmwGTRmdeco/s128-no/";
var maxresults=5;
var splittercolor="#DDDDDD";
var relatedpoststitle="Related Posts";
</script>
<script src=' https://kedar-adhikari.googlecode.com/svn/aajakopatrika.com.js' type='text/javascript'/>
</b:if>
Please remember: - to change the ammount of related post var maxresults=5;,
6. Now find the following code (you might find it twice, stop at the second one):
<div class='post-footer'>
7. Now finaly copy and paste the below code just above the <div class='post-footer'> tag.
<div id='related-posts'>
<b:loop values='data:post.labels' var='label'>
<b:if cond='data:label.isLast != "true"'>
</b:if>
<script expr:src='"/feeds/posts/default/-/" + data:label.name + "?alt=json-in-script&callback=related_results_labels_thumbs&max-results=6"' type='text/javascript'/></b:loop>
<script type='text/javascript'>
removeRelatedDuplicates_thumbs();
printRelatedLabels_thumbs("<data:post.url/>");
</script>
</div><div style='clear:both'/>
<!-- remove --></b:if>
9. Now last step save the templates the related post is successfully has been done!


0 comments:
Post a Comment